Generating Hashsets
You can create your own hashsets using OSForensics.
- Creating a hashset from an existing list of hashes (Quick Hashset).
- Creating a hashset from a folder of files.
- Creating a hashset from an application's files.
- Searching an active hashset.
Hashsets enable quick and easy identification of known files. This could include a collection of known safe files (Ex: Windows OS files) or a collection of known unsafe files (Ex: Trojans). During a file scan/search, files can be checked against a hashset to identify whether these known files are present.
1) Using the ‘Quick Hashset’ Feature to Create a Hashset from an Existing List of Hashes
- Start up OSForensics and click the "Hash Sets" tab. Click "Quick Set..." and you will see the window below.
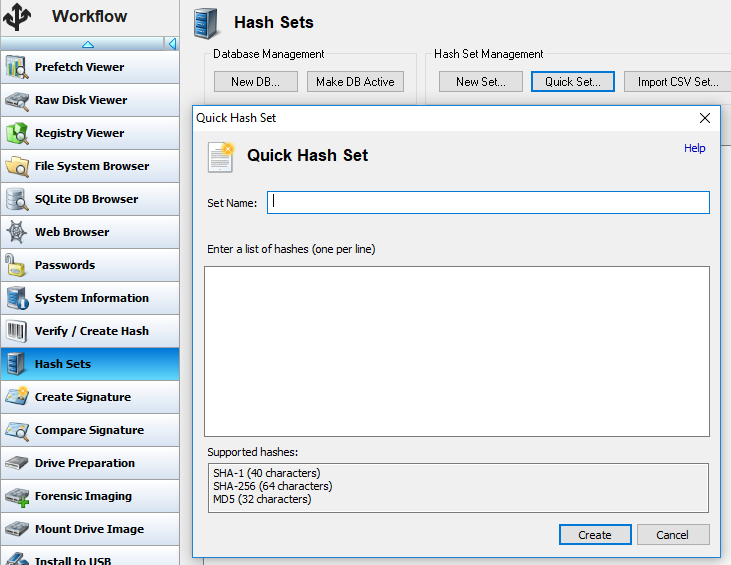
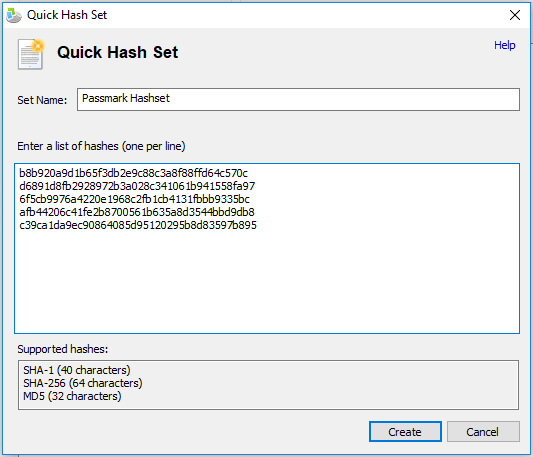
- Provide the hashset with a suitable name and insert the hashes into the space provided (one hash per line). Click "Create". SHA-1 (base 16), SHA-256 and MD5 hashes are supported.
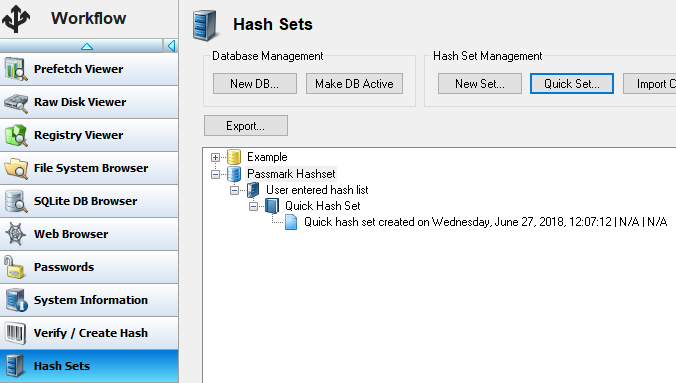
- As seen below, a database containg the hashset is created. It is possible to view the hashset in detail by double clicking it. Generated hashsets are typically found in
C:\ProgramData\PassMark\OSForensics\hashSets
2) Creating a Hashset from a Folder of Files
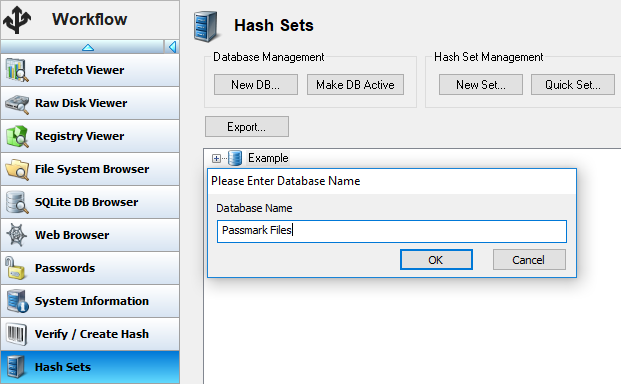
- Start up OSForensics and click the "Hash Sets" tab. You will see the window below. Click "New DB" and provide the database with a suitable name and click "OK".
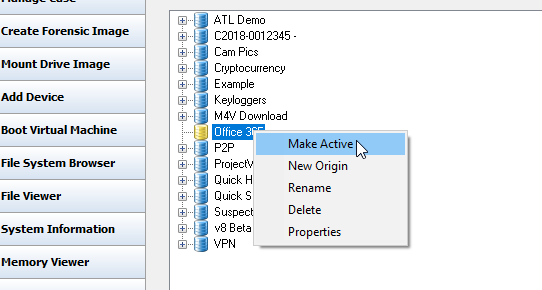
- Set the created database to Active, which will change the colour of the database icon to yellow.
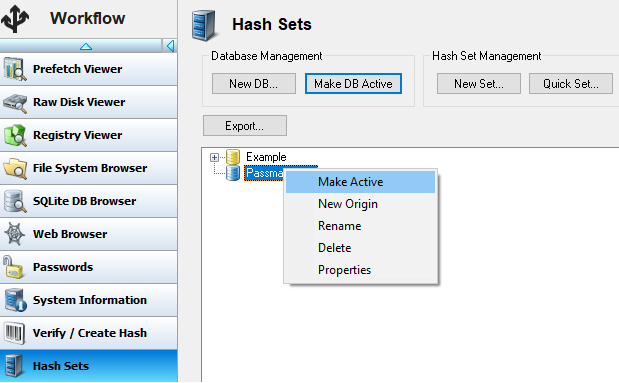
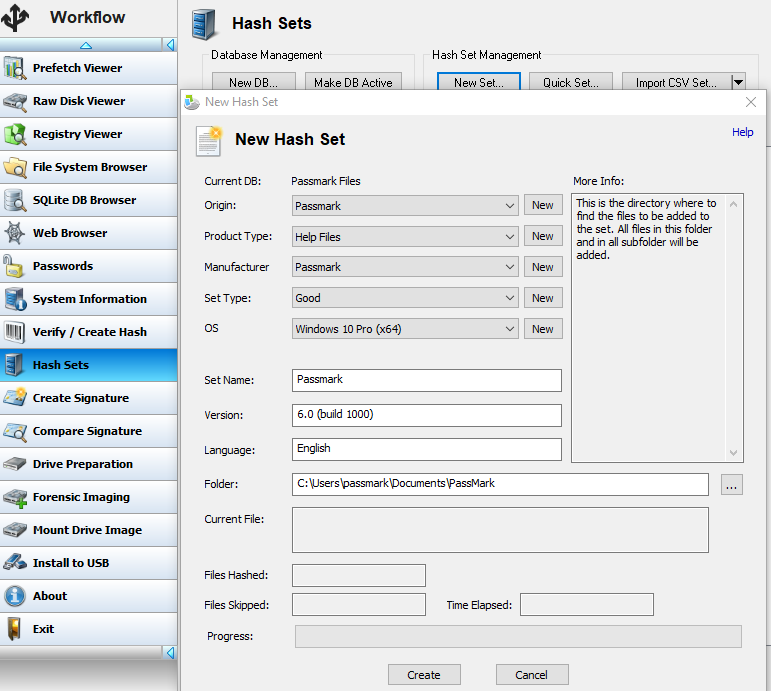
- Click "New Set...". In the window that pops up, enter details of the hashset that is being created. Shown below are details that were entered for a hashset of Passmark help files. To add the folder that needs to be included in the hashset, click on "..." next to the "Folder" field and select the required folder. (Note: For more details of each of the fields, refer to the help file). Click "Create" to create the hashset.
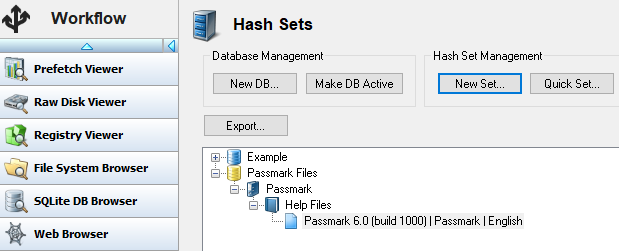
- As seen below, the hashset is added to the active database. It is possible to view the hashset in detail by double clicking it. Generated hashsets are typically found in
C:\ProgramData\PassMark\OSForensics\hashSets
3) Creating a Hashset from an Application's Files
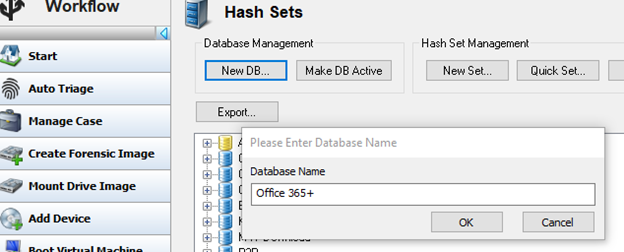
- Start up OSForensics and click the "Hash Sets" tab. You will see the window below. Click "New DB" and provide the database with a suitable name and click "OK".
- Set the created database to Active, which will change the colour of the database icon to yellow.
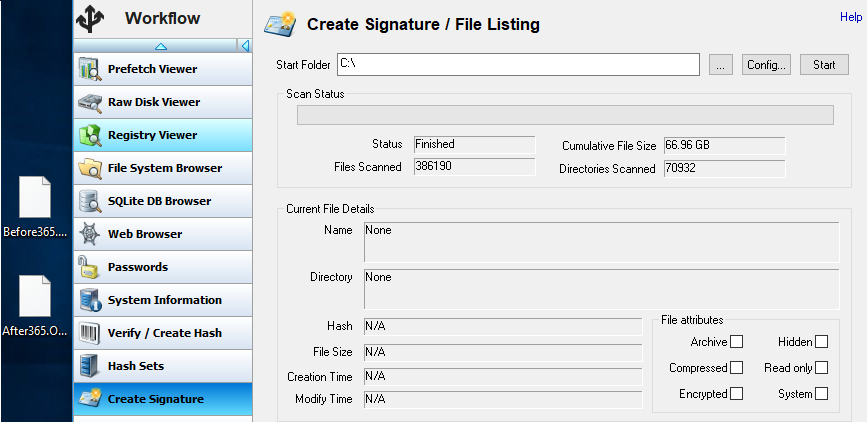
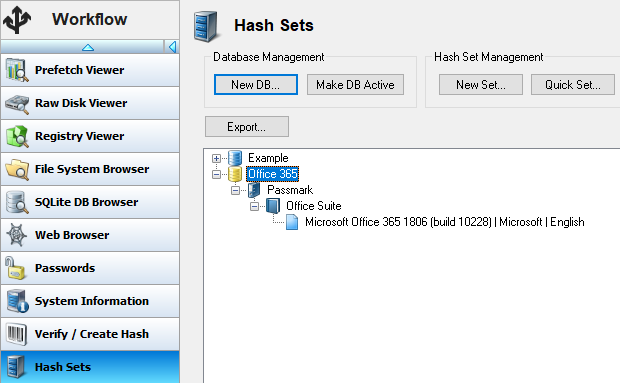
- Move to the "Create Signature" tab. Here, we generate file signatures before and after the installation of the application takes place on the system. In this example, we have created a hashset of Office 365 files. An initial signature was taken prior to the installation (Before365.OSFsig). This was followed by the installation of Office 365. A signature was then generated immediately after the installation (After365.OSFsig). These were saved as seen on the left side of the image below.
Note: In the case where it is not possible to obtain a Before signature (Ex: For the installation of Windows on a blank hard drive) it is possible to use only the After/New signature by leaving the Before/Old signature blank in step 4 or use Method 2.
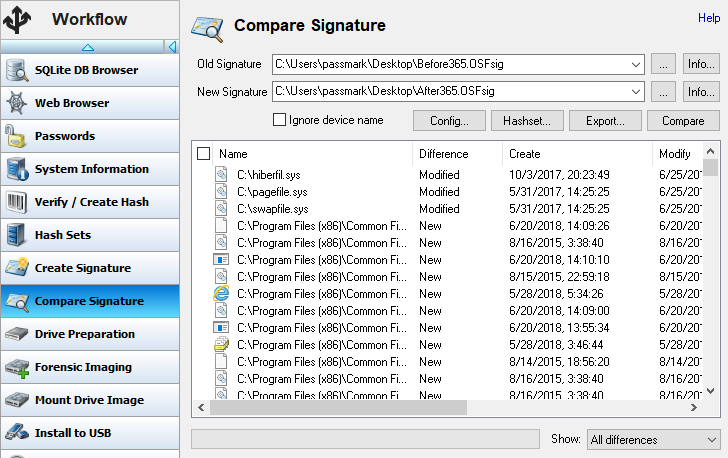
- Move to the "Compare Signature" tab. Here, we compare the before and after versions of signatures that were previously created. The result is a list of new/modified/deleted files from the installation. Hence, these are become the "known" files which forms the hashset.
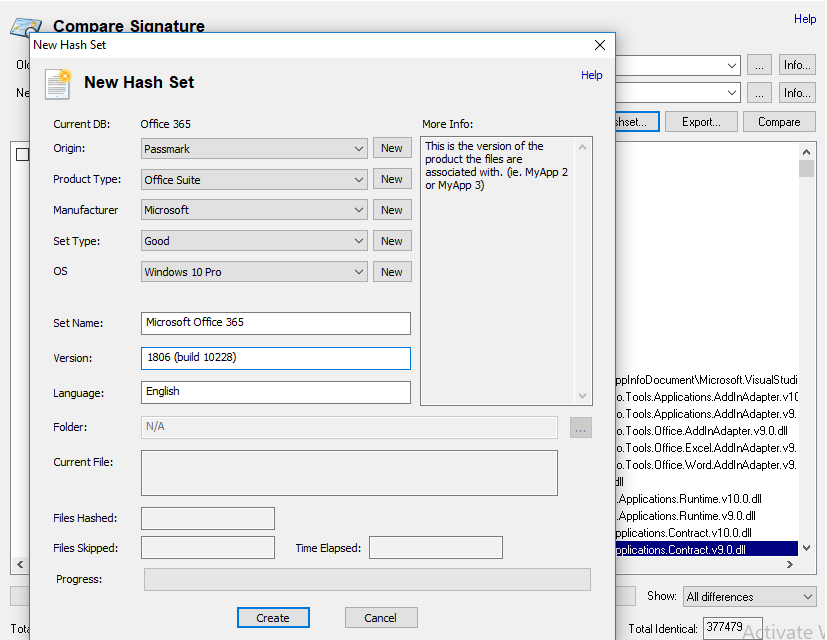
- On the same tab, click "Hashset...". On the New Hash Set window that pops up, enter details of the hashset that is being created. Shown below are details that were entered for the Office 365 hashset example (Note: For more details of each of the fields, refer to the help file). Click "Create" to create the hashset.
- Moving back to the "Hash Sets" tab, it is evident that the hashset has been added to the active database. It is possible to view the hashset in detail by double clicking it. Generated hashsets are typically found in
C:\ProgramData\PassMark\OSForensics\hashSets
4) Searching an Active Hashset
- Users can search a data set for matching files contained in a hashset throughout various modules in OSForensics. One of the simplest ways to search a drive, folder or forensic image file against a hashset is through the File System Browser. Simply open the File System Browser and navigate to the device or directory you wish to search.
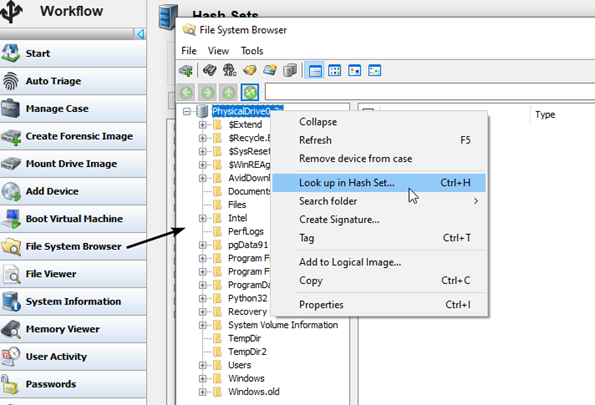
- Right-click your selection and click on the ‘Look up in Hash Set’ option.
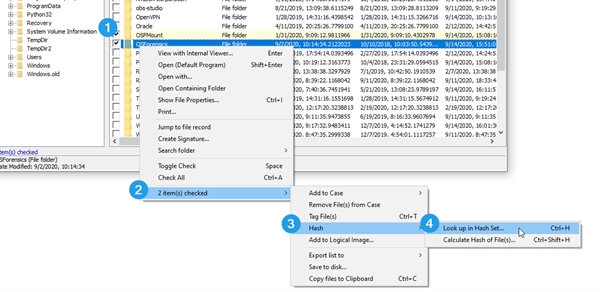
- You can also lookup a custom selected group of folders and files by checking a group of files or directories, right-clicking and following the options shown below…
- Another module which allows for hashset scanning is the File Name Search module. This is very handy to use in conjunction with a Quick Hash Set you have created. Hashing a disk image or a large collection of files can be rather time consuming. One method for quickly searching a system for files matching a particular hash is to conduct a scan for the particular file type(s) you are interested in. For example, if your Quick Hash Set contains MD5 hashes of all video files, it wouldn’t necessarily make sense to hash every file in the file system. Instead, you could use File Name Search to quickly identify all video files on a system. Once the scan is complete, you could then choose to hash just the video files that were found and see if any match your hash set. In the example below, we have used File Name Search to quickly scan a system for all video files.
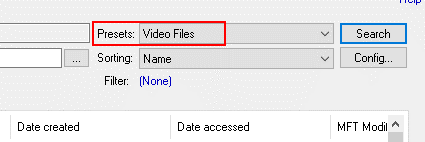
(Simply choose a file type preset and click Search.)
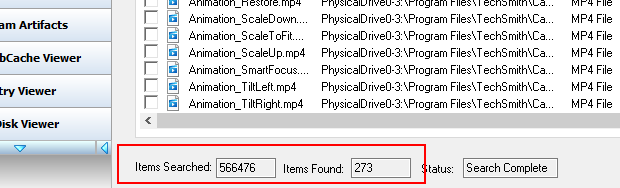
In the screenshot above we have identified only 273 video files on the system. Now we can simply run a Quick Hash Set scan against 273 files, instead of waiting many hours while the software hashed over 500,000 files, when only a very small subset of those were of potential value.
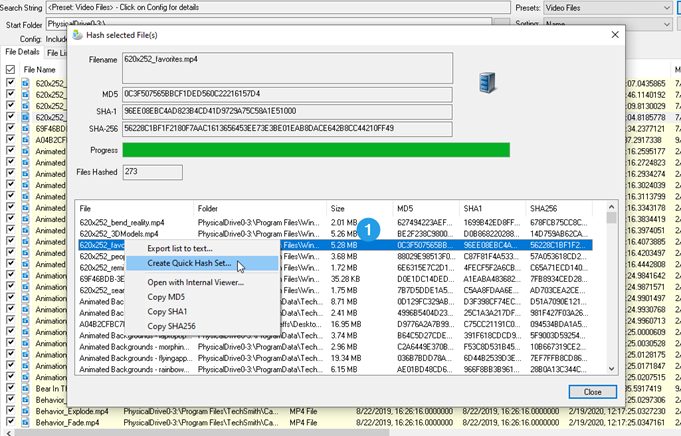
- Next, you will need to checkmark all files that were returned. You can check all files with a single click of the mouse by check-marking the main checkbox in the far left of the column header as shown above. You can then right-click on any of the files in the display, hover your pointer over the number of files checked, then Hash, and then choose ‘Look up in Hash Set’.
*Keep in mind you can also calculate the hashes for all selected files by choosing the ‘Calculate Hash of File(s)’ option. You can then take the output and create a Quick Hash Set through right-click options as shown below.
Copyright © 2024 PassMark™ Software


